Installing a reliable outboard motor on your dinghy is crucial for navigating safely and efficiently while exploring the open sea with your family.
Installing a New Outboard Motor on Your Dinghy
As you embark on your sailing adventure with your family, one of the essential pieces of equipment you’ll need is a reliable dinghy or tender. These small boats are crucial for getting to and from shore, exploring shallow waters, and even serving as a backup in case of emergencies. One of the most important aspects of your dinghy is its outboard motor, which provides the power and maneuverability you need to navigate safely and efficiently.
In this comprehensive guide, we’ll walk you through the process of selecting and installing a new outboard motor on your dinghy. We’ll cover everything from choosing the right motor for your needs, to the installation process, and even some tips for maintaining your new motor. So, let’s dive in!
Table of Contents
- Choosing the Right Outboard Motor
- Preparing for Installation
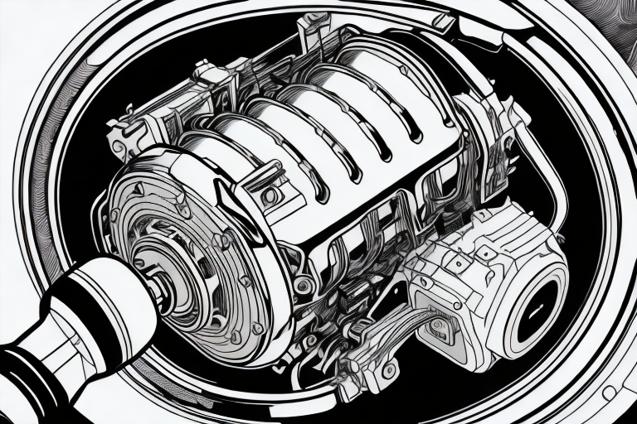
- Installing the Outboard Motor
- Testing and Fine-Tuning
- Maintenance Tips
Choosing the Right Outboard Motor
Before you can install a new outboard motor on your dinghy, you’ll need to choose the right one for your needs. There are several factors to consider when selecting an outboard motor, including:
Power and Size
The size and power of your outboard motor will depend on the size and weight of your dinghy, as well as your intended use. For smaller dinghies, a 2-6 horsepower (HP) motor may be sufficient, while larger tenders may require a 10-20 HP motor. Consider how you plan to use your dinghy – if you’ll be carrying heavy loads or traveling long distances, you may need a more powerful motor.
Fuel Type
Outboard motors are available in both gasoline and electric models. Gasoline motors tend to be more powerful and have a longer range, but they also require more maintenance and can be noisy and polluting. Electric motors are quieter, cleaner, and require less maintenance, but they may have a shorter range and less power. Consider your priorities and the availability of fuel sources when choosing a motor.
Shaft Length
The shaft length of your outboard motor should match the transom height of your dinghy. Measure the distance from the top of the transom to the bottom of the hull, and choose a motor with a shaft length that falls within this range. A motor with a shaft that is too short may not provide enough propulsion, while a motor with a shaft that is too long may cause the propeller to hit the bottom of the boat.
Brand and Warranty
Finally, consider the reputation of the manufacturer and the warranty offered on the motor. Look for a reputable brand with a history of producing reliable, high-quality outboard motors, and a warranty that covers at least a few years of use.
Preparing for Installation
Once you’ve chosen the right outboard motor for your dinghy, it’s time to prepare for installation. Gather the necessary tools and materials, and ensure that your dinghy is clean and in good condition. You’ll need:
- A suitable outboard motor
- A motor mount or bracket (if not included with the motor)
- A fuel tank and fuel line (for gasoline motors)
- A battery and charging system (for electric motors)
- A set of wrenches and sockets
- A torque wrench
- A drill and drill bits (if you need to drill holes for the motor mount)
- Marine grease and anti-seize compound
- A friend or family member to help with lifting and positioning the motor
Installing the Outboard Motor
With your tools and materials ready, it’s time to install your new outboard motor. Follow these steps to ensure a successful installation:
-
Attach the motor mount or bracket: If your dinghy doesn’t already have a motor mount or bracket, you’ll need to install one. Follow the manufacturer’s instructions for attaching the mount to the transom of your dinghy, ensuring that it is level and secure. You may need to drill holes for the mounting bolts – be sure to use marine sealant to prevent water from entering the holes.
-
Lift and position the motor: With the help of a friend or family member, carefully lift the outboard motor and position it on the motor mount or bracket. Ensure that the motor is centered on the transom and that the shaft length is appropriate for your dinghy.
-
Secure the motor: Using the provided bolts and nuts, secure the motor to the mount or bracket. Tighten the bolts evenly and to the manufacturer’s recommended torque specifications, using a torque wrench.
-
Connect the fuel system (for gasoline motors): Attach the fuel line from the fuel tank to the motor, ensuring that the connections are tight and secure. If your motor has a built-in fuel tank, fill it with the appropriate gasoline mixture according to the manufacturer’s instructions.
-
Connect the battery and charging system (for electric motors): Attach the battery cables to the motor, ensuring that the connections are tight and secure. Connect the charging system to the battery, following the manufacturer’s instructions.
-
Apply marine grease and anti-seize compound: To prevent corrosion and ensure smooth operation, apply marine grease to the motor’s moving parts, such as the throttle and shift linkage. Apply anti-seize compound to the propeller shaft and other metal-to-metal connections.
Testing and Fine-Tuning
With your new outboard motor installed, it’s time to test it out and make any necessary adjustments. Follow these steps to ensure optimal performance:
-
Check for leaks: Before starting the motor, check for any fuel or oil leaks. If you find any, address the issue before proceeding.
-
Start the motor: Following the manufacturer’s instructions, start the motor and let it idle for a few minutes. Listen for any unusual noises or vibrations, and check for any warning lights or indicators.
-
Test the throttle and shift controls: While the motor is idling, test the throttle and shift controls to ensure smooth and responsive operation. Make any necessary adjustments according to the manufacturer’s instructions.
-
Test the motor in the water: With the motor running smoothly, it’s time to test it in the water. Launch your dinghy and carefully navigate to an open area where you can safely test the motor’s performance. Gradually increase the throttle and observe the motor’s power, speed, and handling. Make any necessary adjustments to the trim, tilt, or other settings to optimize performance.
Maintenance Tips
To keep your new outboard motor running smoothly and reliably, follow these maintenance tips:
-
Regularly check and change the oil: For gasoline motors, check the oil level before each use and change the oil according to the manufacturer’s recommended schedule. For electric motors, check the gear oil level and change it as needed.
-
Inspect and replace the fuel filter: For gasoline motors, regularly inspect the fuel filter for debris and replace it as needed to ensure optimal fuel flow.
-
Clean and lubricate the motor: Regularly clean the motor’s exterior and apply marine grease to the moving parts to prevent corrosion and ensure smooth operation.
-
Inspect and replace the propeller: Regularly inspect the propeller for damage, and replace it if necessary to maintain optimal performance.
-
Store the motor properly: When not in use, store the motor in a dry, well-ventilated area, and follow the manufacturer’s instructions for long-term storage.
By following these steps and maintaining your new outboard motor, you’ll ensure that your dinghy is always ready for your next adventure on the open sea. Happy sailing!