Building a custom cockpit table for your boat is a great way to create a functional and personalized space for dining, socializing, and navigation while out on the water.
How to Build a Custom Cockpit Table
Welcome to another exciting article in our DIY boat projects series! Today, we’ll be guiding you through the process of building a custom cockpit table for your boat. A cockpit table is an essential addition to any sailing vessel, providing a convenient space for dining, socializing, and even navigation. By building your own, you can create a table that perfectly suits your needs and the unique dimensions of your boat.
In this comprehensive guide, we’ll cover everything you need to know to build a custom cockpit table, including:
- Planning and designing your table
- Choosing the right materials
- Tools and equipment you’ll need
- Step-by-step instructions for construction
- Tips for installation and maintenance
So, let’s dive in and start building your dream cockpit table!
Planning and Designing Your Table
Before you begin building your cockpit table, it’s essential to plan and design it carefully. This will ensure that your table is functional, aesthetically pleasing, and fits perfectly within your boat’s cockpit. Here are some factors to consider during the planning and design phase:
Functionality
Think about how you’ll be using your cockpit table. Will it primarily be used for dining, or do you also need space for navigation equipment, such as charts and instruments? Consider the number of people who will typically be using the table and ensure there’s enough seating space for everyone.
Dimensions
Measure the available space in your cockpit to determine the ideal dimensions for your table. Be sure to account for any existing seating or equipment that may affect the table’s placement. It’s also essential to consider the height of the table, ensuring it’s comfortable for both seated and standing users.
Foldability and Storage
If space is limited in your cockpit, you may want to design a foldable table that can be easily stowed away when not in use. This can be achieved by incorporating hinges or removable legs into your design.
Materials
Choose materials that are durable, weather-resistant, and suitable for marine environments. Teak, mahogany, and marine-grade plywood are popular choices for cockpit tables due to their strength and resistance to moisture and UV damage.
Choosing the Right Materials
Now that you have a clear idea of your table’s design, it’s time to select the materials you’ll need for construction. Here are some popular options for cockpit table materials:
Teak
Teak is a popular choice for boat furniture due to its durability, weather resistance, and attractive appearance. It’s also relatively easy to work with, making it an excellent option for DIY projects. However, teak can be expensive, so you may want to consider other options if you’re on a tight budget.
Mahogany
Mahogany is another attractive and durable wood that’s suitable for marine environments. It’s less expensive than teak but still offers excellent weather resistance and longevity. Mahogany can be more challenging to work with than teak, so keep this in mind if you’re new to woodworking.
Marine-Grade Plywood
Marine-grade plywood is a more affordable option for cockpit tables and is specifically designed for use in marine environments. It’s made from high-quality hardwood veneers and is treated to resist moisture and rot. When choosing marine-grade plywood, look for a product that’s labeled as “BS1088” or “Lloyds Approved” to ensure it meets the highest standards for marine use.
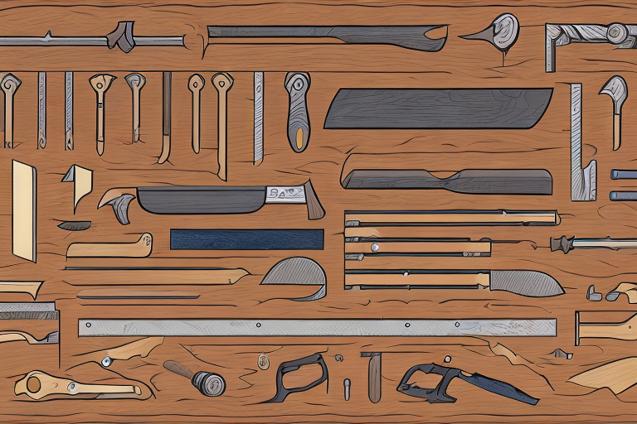
Tools and Equipment You’ll Need
Before you begin construction, gather the necessary tools and equipment for your project. Here’s a list of items you’ll need:
- Measuring tape
- Pencil
- Straight edge or carpenter’s square
- Circular saw or jigsaw
- Drill with various drill bits
- Sandpaper (80, 120, and 220 grit)
- Wood glue
- Clamps
- Marine-grade varnish or sealant
- Paintbrushes
- Hardware for attaching the table to your boat (e.g., hinges, brackets, or removable table leg mounts)
Step-by-Step Instructions for Construction
With your materials and tools ready, it’s time to start building your custom cockpit table. Follow these step-by-step instructions to create a beautiful and functional table for your boat:
Step 1: Cut the Tabletop
Using your chosen material, cut the tabletop to your desired dimensions using a circular saw or jigsaw. If your table will be foldable, cut the tabletop into two equal halves. Sand the edges of the tabletop with 80-grit sandpaper to remove any rough spots or splinters.
Step 2: Cut and Attach the Table Edging
To create a raised edge around your table, cut strips of wood to the same thickness as your tabletop and the desired height of your edging. Attach the edging to the tabletop using wood glue and clamps, ensuring the edges are flush with the tabletop surface. Allow the glue to dry according to the manufacturer’s instructions.
Step 3: Sand and Finish the Tabletop
Once the glue has dried, sand the entire tabletop and edging with 120-grit sandpaper, followed by 220-grit sandpaper for a smooth finish. Wipe the table clean with a tack cloth to remove any dust.
Apply a marine-grade varnish or sealant to the tabletop and edging, following the manufacturer’s instructions for application and drying times. This will protect your table from moisture, UV damage, and wear.
Step 4: Attach the Table Legs
If your table will have fixed legs, cut them to your desired length and attach them to the underside of the tabletop using wood glue and screws. For a foldable table, attach the legs using hinges or removable table leg mounts, ensuring they can be easily folded or removed for storage.
Step 5: Install the Table in Your Cockpit
Once your table is complete, install it in your cockpit using the appropriate hardware for your boat. This may include hinges, brackets, or removable table mounts. Ensure the table is securely attached and level before use.
Tips for Installation and Maintenance
To keep your custom cockpit table looking and functioning its best, follow these tips for installation and maintenance:
- When installing your table, ensure it’s securely attached and level to prevent wobbling or tipping during use.
- Regularly inspect your table for signs of wear or damage, such as loose hardware, cracks, or peeling varnish. Address any issues promptly to prevent further damage.
- Clean your table regularly with mild soap and water to remove dirt, salt, and other debris. Avoid using harsh chemicals or abrasive cleaners, as these can damage the table’s finish.
- Reapply marine-grade varnish or sealant as needed to maintain your table’s weather resistance and appearance.
With careful planning, quality materials, and proper maintenance, your custom cockpit table will provide years of enjoyment and functionality on your sailing adventures. Happy building, and fair winds!