Installing an autopilot system on your boat can greatly enhance your sailing experience, providing increased comfort, improved navigation, and reduced fatigue.
Installing a New Autopilot System
Embarking on a sailing adventure with your family is an exciting and fulfilling experience. As you leave the rat race behind and embrace the open sea, it’s essential to have the right equipment on board to ensure a safe and enjoyable journey. One such piece of equipment is an autopilot system. In this article, we’ll guide you through the process of installing a new autopilot system on your boat, covering everything from selecting the right system to the final installation steps.
Table of Contents
- Why Install an Autopilot System?
- Selecting the Right Autopilot System
- Preparing for Installation
- Installing the Autopilot System
- Conclusion
Why Install an Autopilot System?
An autopilot system is an essential piece of equipment for any boat, providing numerous benefits to enhance your sailing experience. Some of the key advantages of having an autopilot system on board include:
- Reduced fatigue: Long hours at the helm can be tiring, especially during overnight passages or when sailing in rough conditions. An autopilot system allows you to take a break from steering, reducing fatigue and increasing overall safety.
- Improved navigation: Modern autopilot systems can integrate with GPS and chartplotter devices, allowing you to follow a predetermined route with greater accuracy and ease.
- Better fuel efficiency: By maintaining a consistent course, an autopilot system can help reduce fuel consumption and improve overall efficiency.
- Increased comfort: With the boat maintaining a steady course, passengers can enjoy a more comfortable ride, especially in rough seas.
Selecting the Right Autopilot System
Before you can install an autopilot system, you’ll need to choose the right one for your boat. There are several factors to consider when selecting an autopilot system, including the type of system, key features, and compatibility with your boat.
Types of Autopilot Systems
There are two main types of autopilot systems: wheel pilots and below-deck systems. Each has its own advantages and disadvantages, so it’s essential to choose the one that best suits your needs and your boat.
-
Wheel pilots: These systems are designed for smaller boats with a wheel steering system. They are relatively easy to install and are typically more affordable than below-deck systems. However, they may not be suitable for larger boats or those with more powerful steering systems.
-
Below-deck systems: These systems are installed below the deck and are connected directly to the boat’s steering system. They are more robust and can handle larger boats and more powerful steering systems. However, they are generally more expensive and require a more complex installation process.
Key Features to Consider
When selecting an autopilot system, there are several key features to consider:
- Compatibility: Ensure that the autopilot system is compatible with your boat’s steering system and any existing electronics, such as GPS and chartplotter devices.
- Performance: Look for a system that offers reliable performance in various conditions, including rough seas and strong winds.
- Ease of use: Choose a system with an intuitive interface and easy-to-use controls, making it simple to operate even for those new to sailing.
- Integration: Consider a system that can integrate with other onboard electronics, such as wind instruments and radar, for enhanced functionality and convenience.
Preparing for Installation
Before you begin the installation process, it’s essential to gather the necessary tools and materials and take appropriate safety precautions.
Tools and Materials
To install an autopilot system, you’ll need the following tools and materials:
- Drill and drill bits
- Screwdrivers
- Wrenches
- Wire strippers and crimpers
- Marine-grade electrical connectors
- Cable ties
- Marine sealant
Safety Precautions
When working with electrical systems on a boat, it’s crucial to follow proper safety precautions:
- Disconnect power: Before beginning any work, ensure that all power sources are disconnected, including the boat’s battery and shore power.
- Use marine-grade components: Always use marine-grade electrical connectors and wiring to ensure a safe and reliable installation.
- Follow manufacturer guidelines: Carefully read and follow the manufacturer’s installation instructions and recommendations for your specific autopilot system.
Installing the Autopilot System
With the right autopilot system selected and the necessary tools and materials gathered, it’s time to begin the installation process. While the exact steps may vary depending on the specific system you’ve chosen, the general process will involve the following steps:
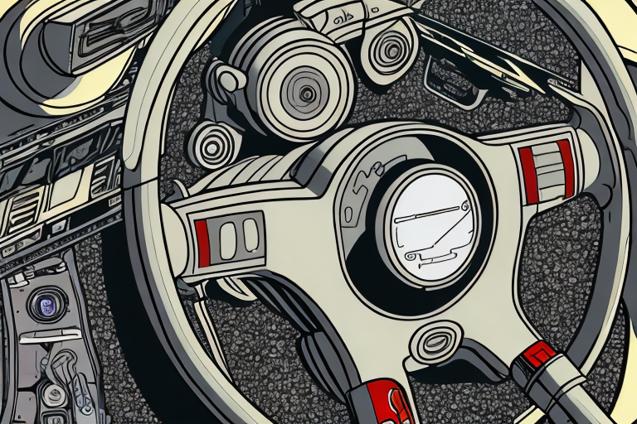
Step 1: Mounting the Control Head
The control head is the user interface for the autopilot system and should be mounted in a convenient location near the helm. When choosing a location, consider factors such as visibility, accessibility, and protection from the elements.
- Mark the mounting location: Using the control head’s mounting template, mark the location for the mounting holes and any necessary cutouts for cables.
- Drill holes and cutouts: Carefully drill the mounting holes and cut out any necessary openings for cables.
- Mount the control head: Secure the control head in place using the provided mounting hardware and apply marine sealant around the edges to prevent water ingress.
Step 2: Installing the Drive Unit
The drive unit is responsible for physically turning the boat’s steering system and should be installed according to the manufacturer’s guidelines. This process will vary depending on whether you have a wheel pilot or a below-deck system.
- Wheel pilot installation: For wheel pilots, the drive unit typically clamps onto the wheel and is connected to the control head via a cable. Follow the manufacturer’s instructions for proper mounting and alignment.
- Below-deck system installation: For below-deck systems, the drive unit will need to be connected directly to the boat’s steering system, such as the rudder or quadrant. This process may require additional mechanical modifications and should be performed according to the manufacturer’s guidelines.
Step 3: Connecting the Electronics
With the control head and drive unit installed, it’s time to connect the electronics. This will involve running cables between the various components and connecting them to the boat’s power supply.
- Run cables: Carefully run the necessary cables between the control head, drive unit, and any other integrated electronics, such as GPS and chartplotter devices. Use cable ties to secure the cables and prevent them from moving or chafing.
- Connect the electronics: Using marine-grade electrical connectors, connect the autopilot system’s components according to the manufacturer’s wiring diagram.
- Connect to power: Connect the autopilot system to the boat’s power supply, ensuring that the appropriate fuses and circuit breakers are in place.
Step 4: Calibration and Testing
With the autopilot system installed and connected, it’s time to calibrate and test the system to ensure proper operation.
- Calibrate the system: Follow the manufacturer’s instructions for calibrating the autopilot system, which may involve setting the compass, rudder, and other sensors.
- Test the system: With the boat underway, test the autopilot system’s various functions, such as maintaining a steady course, following a predetermined route, and integrating with other onboard electronics.
Conclusion
Installing a new autopilot system on your boat can greatly enhance your sailing experience, providing increased comfort, improved navigation, and reduced fatigue. By carefully selecting the right system for your boat and following the proper installation steps, you’ll be well on your way to enjoying the freedom and fulfillment that comes from embracing the open sea with your family.