Replacing a boat's headliner is a crucial step in maintaining a healthy living environment and improving the appearance and functionality of your cabin.
Installing a New Headliner on Your Boat
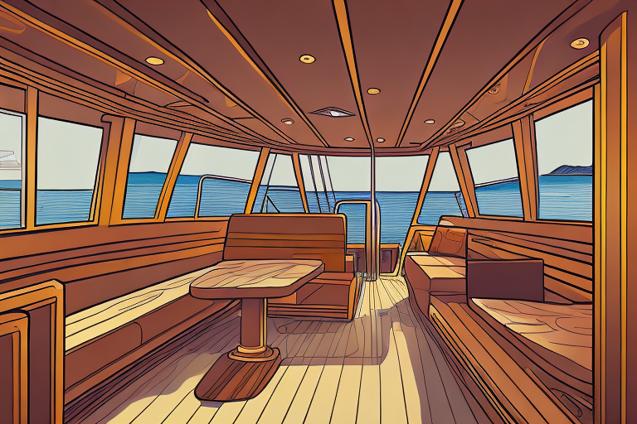
Welcome to another informative article in our Boat Modifications and Upgrades section. Today, we will be discussing a crucial aspect of interior design and organization: installing a new headliner on your boat. A headliner is the material that covers the interior ceiling of your boat’s cabin, providing insulation, soundproofing, and a clean, finished appearance. Over time, headliners can become damaged, stained, or simply outdated, making it necessary to replace them. In this comprehensive guide, we will walk you through the process of installing a new headliner on your boat, ensuring that your living space remains comfortable, functional, and aesthetically pleasing.
Table of Contents
- Why Replace Your Headliner?
- Choosing the Right Material
- Tools and Materials Needed
- Preparing the Workspace
- Removing the Old Headliner
- Measuring and Cutting the New Headliner
- Installing the New Headliner
- Finishing Touches
- Maintenance and Care
- Conclusion
Why Replace Your Headliner?
There are several reasons why you might want to replace your boat’s headliner:
- Aesthetics: An old, stained, or sagging headliner can detract from the overall appearance of your boat’s interior. Replacing it with a fresh, new material can instantly update and improve the look of your cabin.
- Insulation: A well-insulated headliner can help regulate the temperature inside your boat, keeping it cooler in the summer and warmer in the winter. If your current headliner is not providing adequate insulation, it may be time for an upgrade.
- Soundproofing: A quality headliner can help dampen noise from outside the cabin, as well as reduce vibrations and echoes within the space. If your current headliner is not providing sufficient soundproofing, consider replacing it with a more effective material.
- Mold and Mildew: Over time, moisture can cause mold and mildew to form on your headliner, posing a health risk and creating unpleasant odors. Replacing a moldy headliner is essential for maintaining a healthy living environment on your boat.
Choosing the Right Material
When selecting a new headliner material, consider the following factors:
- Durability: Choose a material that is resistant to wear and tear, as well as moisture and UV damage. Vinyl and marine-grade fabrics are popular choices for their durability and ease of maintenance.
- Insulation: Look for materials with insulating properties to help regulate the temperature inside your boat. Foam-backed vinyl and carpet-like materials can provide additional insulation and soundproofing.
- Ease of Installation: Some materials are easier to work with than others. Flexible materials like vinyl and fabric are generally easier to install than rigid materials like wood or fiberglass.
- Appearance: Consider the overall look and feel you want to achieve in your boat’s interior. There are countless colors, patterns, and textures available, so choose a material that complements your existing décor and personal style.
Tools and Materials Needed
Before you begin the installation process, gather the following tools and materials:
- New headliner material
- Measuring tape
- Scissors or utility knife
- Straight edge or T-square
- Adhesive (appropriate for your chosen material)
- Paint roller or brush (for applying adhesive)
- Staple gun and staples (optional, for certain materials)
- Trim or molding (for finishing edges)
- Screwdriver (for removing and reinstalling hardware)
- Protective gloves and eyewear
Preparing the Workspace
Before you begin removing the old headliner, take the time to properly prepare your workspace:
- Clear the Area: Remove any furniture, cushions, or other items from the cabin to create a clean, open workspace.
- Protect Surfaces: Cover the floor and any nearby surfaces with drop cloths or plastic sheeting to protect them from adhesive and debris.
- Ventilation: Ensure that your workspace is well-ventilated, as some adhesives can produce strong fumes. Open windows and doors, and consider using a fan to improve air circulation.
- Safety: Wear protective gloves and eyewear to protect yourself from potential hazards during the installation process.
Removing the Old Headliner
Before you can install your new headliner, you’ll need to remove the old one. Follow these steps to safely and effectively remove your existing headliner:
- Remove Hardware: Carefully remove any hardware, such as lights, vents, or handrails, that may be attached to the headliner. Be sure to keep track of any screws or other small parts so you can easily reinstall them later.
- Detach the Headliner: Depending on the type of headliner you have, it may be attached with adhesive, staples, or both. Carefully peel back the material, using a scraper or putty knife if necessary to help loosen the adhesive. If your headliner is stapled, use a staple remover or flathead screwdriver to carefully pry out the staples.
- Clean the Surface: Once the headliner has been removed, thoroughly clean the ceiling surface to remove any remaining adhesive, staples, or debris. This will ensure a smooth, even surface for installing your new headliner.
Measuring and Cutting the New Headliner
With the old headliner removed and the surface cleaned, you’re ready to measure and cut your new headliner material. Follow these steps for accurate measurements and precise cuts:
- Measure the Ceiling: Using a measuring tape, measure the length and width of your boat’s ceiling, adding a few extra inches to each dimension to allow for trimming and adjustments during installation.
- Mark and Cut the Material: Lay your new headliner material out on a clean, flat surface. Using a straight edge or T-square, mark the dimensions you measured onto the material. Carefully cut along the marked lines with scissors or a utility knife, ensuring that your cuts are straight and even.
Installing the New Headliner
With your new headliner material cut to size, you’re ready to begin the installation process. Follow these steps for a successful installation:
- Apply Adhesive: Following the manufacturer’s instructions, apply adhesive to the back of your headliner material using a paint roller or brush. Be sure to apply an even, consistent layer of adhesive, taking care not to leave any gaps or clumps.
- Position the Material: Carefully lift the headliner material and position it on the ceiling, starting at one end and working your way across. Press the material firmly onto the surface, smoothing out any wrinkles or bubbles as you go.
- Trim Excess: Once the headliner is fully adhered to the ceiling, use a utility knife to carefully trim away any excess material along the edges.
- Secure with Staples (Optional): If your headliner material requires additional support, use a staple gun to secure the edges of the material to the ceiling. Be sure to space the staples evenly and keep them as close to the edge as possible to ensure a clean, professional appearance.
Finishing Touches
With your new headliner installed, it’s time to add the finishing touches:
- Install Trim or Molding: To create a clean, finished edge along the perimeter of your headliner, install trim or molding. This can be attached with adhesive, nails, or screws, depending on the type of trim and your boat’s construction.
- Reinstall Hardware: Carefully reinstall any hardware that was removed during the headliner removal process, such as lights, vents, or handrails.
- Clean Up: Remove any protective coverings from your workspace and clean up any debris or adhesive residue.
Maintenance and Care
To keep your new headliner looking and performing its best, follow these maintenance and care tips:
- Clean Regularly: Gently clean your headliner with a damp cloth and mild soap, taking care not to saturate the material or damage the adhesive. Be sure to address any spills or stains promptly to prevent permanent damage.
- Inspect for Damage: Periodically inspect your headliner for signs of wear, damage, or mold and mildew. Address any issues promptly to prevent further damage and maintain a healthy living environment on your boat.
- Avoid Overloading: Be mindful of the weight and distribution of items stored in your boat’s cabin, as excessive weight or uneven distribution can cause stress on the headliner and lead to sagging or damage.
Conclusion
Installing a new headliner on your boat is a rewarding project that can greatly improve the comfort, functionality, and appearance of your living space. By following this comprehensive guide, you can confidently tackle this project and enjoy the benefits of a fresh, updated headliner. Remember to choose a durable, high-quality material, and take the time to properly prepare your workspace and follow each step of the installation process. With a little patience and attention to detail, you’ll be well on your way to a beautiful, functional headliner that will serve you well for years to come.